Saturday, February 15, 2014

Challenge three; Pink

I had some problems with this challenge, for starters I love pink but never wear it. I also have lots of pink fabrics, that are all too small to make a garment from. First I wanted to use this lovely vintage seersucker:


I bought it on Etsy and sadly it was quite stained, I couldn't get all of the stains out either. I won't be naming the seller here for obvious reasons. But it was just too small to make something from, I only had 32"x64". I tried many other fabrics and patterns but nothing spoke to me!

In spite of this though, I actually sewed three pink things this fortnight! Sadly the best was not an historical garment; I made my daughter a coat! She selected the fabrics (lovely pink coating and pink, black and white lining from Fashion Fabrics Club) and pattern (Marmalade from Tamanegi-Kobo). It came out quite nicely, though the pattern matching and hand stitching made it a rather intense project! In fact it took up over half of the fortnight to complete. If anyone is interested let me know and I will post some pictures of it!

For this challenge I originally intended to make something like this blouse:


which is currently for sale at Ode to June on Etsy. I don't own the pattern (but someone should buy it because it's beautiful! And um, make me a copy, please?) so I used one of my basic bodice blocks to cut it out and then I sewed it up without trying it on (because I am foolish). Unfortunatly I used my unaltered block (foolish) which does not account for my square shoulders at all! Big mistake, there were large puffs on the tops of my shoulders which took a lot of work to fix. But fix it I did.

I hand sewed the sleeve hems and the tie belt at the hip with a blanket stitch but sewed the rest by machine. In all I really like how the blouse turned out, though it is a bit large in the hips. I may take some small tucks in the hem to snug it up a bit.


The Challenge: Pink

Fabric: 1 yard apricot cotton voile

Pattern: My own

Year: 1928

Notions: Pink thread, embroidery floss in colors 842 and 3779

How historically accurate is it? 95%, I did some decorative machine zig-zaging on the ties.

Hours to complete: Three-ish

First worn: Today! Photos forthcoming!

Total cost: All from stash so, free!

After that I hand sewed a pair of pink garters with some lovely pink striped ribbon I had on hand, I used lace as a backing and added three mother of pearl buttons to each. I had made some vintage style ribbon rosettes but I found them unsatisfactory, probably due to the cheap polyesteryness of the ribbon. The beads look much better! To make them I simply measured my thigh and added half of that measure to get my length then sewed ribbon to lace with a running back stitch and threaded through the elastic. Sewing on the beads was the most time consuming part (and bent my needle into a nice curve!).


The Challenge: Pink

Fabric: 2 yards pink ribbon, 2 yards white lace, 28" elastic

Pattern: none

Year: 1923

Notions: 6 Mother of pearl beads, thread

How historically accurate is it? Let's say 95%, my fabric is definitely synthetic, regardless of what JoAnns says.

Hours to complete: Under an hour

First worn: Today, for photographs!

Total cost: Beads-$2.00, the rest was from stash.


Friday, January 31, 2014

Challenge two; Innovation

For challenge one I made a dress inspired by Madeleine Vionnet, I chose it as a bit of practice for challege #2. So, without further ado, here is my Innovation dress, made from the pattern of an actual Vionnet in the Met. Images of the original are side by side with my dress, for comparison.


I chose this dress as it joins bias and straight seams along several edges, an innovation often credited to Ms.Vionnet. All the pieces are cut on grain, but in sewing it up several of them meet on the bias.


I used the pattern in Betty Kirke's book Madeleine Vionnet which I enlarged and taped together as one does with electronic patterns. What can I say, I'm glad I practiced first! The fabric I used was a rayon crepe which was rather difficult to work with, it was also weightier than the fabric used in the original. The beefiness of it made things go together differently and thus required a fair bit of basting. This, combined with the fitting issues required by bias fitted garments means that it took a while to sew.


I buttonhole stitched the seams, instead of satin stitching them, after I basted the edges together.


I also tacked the wrist ties to the outside of the sleeves, the practice buttonholes I made looked vaguely vulgar to me (also this crepe is incredibly frayey!).


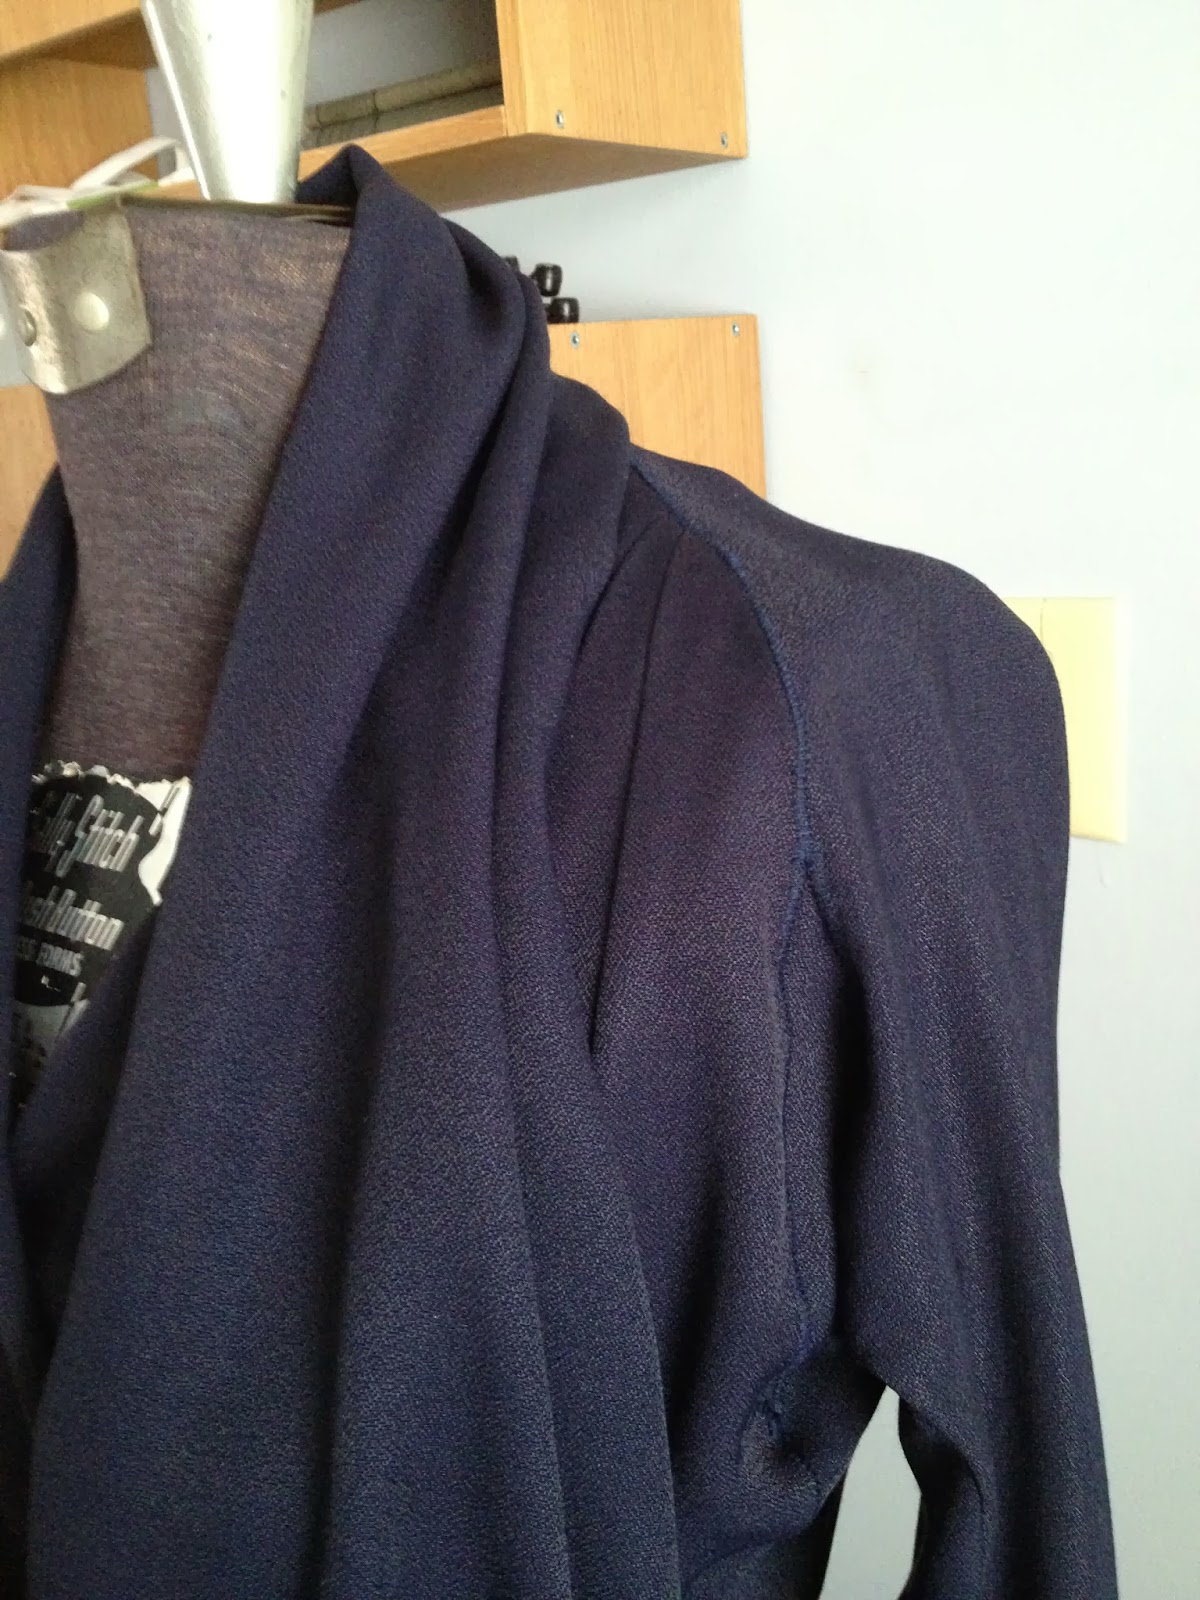
I hand stitched the sleeve bands on with a faggoting stitch as was done on the original. I used a gray-blue DMC embroidery floss which I had on hand and looked nice with the color of the crepe. Also, my navy thread blends in much better than it seems to in this picture!


The Challenge: Innovation

Fabric: Three yards of navy blue rayon crepe

Pattern: Number 27 from Betty Kirke's book

Year: 1920

Notions: Vintage thread in navy, DMC embroidery floss #317

How historically accurate is it? Fairly, the pattern is from an extant garment but it is mostly machine sewn, I did baste everything by hand though. Silk crepe was used in the original but I used rayon crepe.

Hours to complete: No idea! I worked on it whenever I got the chance and with all the pinning, basting and fitting, I'm guessing quite a few!

First worn: To my daughter's school's International Festival (Well, my father's side of the family is from France...).

Total cost: $9.40, my fabric was on sale and my thread was vintage.

Sadly this dress has confirmed that my bust is just too large for this style of dress, and that surplice bodices are simply not my friends. Oh well, I will still wear this dress and perhaps once my baby is weaned it will look better!

Tuesday, January 14, 2014

HSF 2014, Challenge one, Make do and Mend


After I stopped participating rather early in the HSF last year I am determined to complete all of the challenges this year. I will be doing rather short blog posts but there will be plenty of pictures on my Flikr page.

Make do and mend

For challenge one I had intended to made a 1940's suit from a suit, but after painstakingly ripping and pressing the suit in question I found that my pattern pieces did not fit well enough to use it. Ah well, now it shall become children's clothes and perhaps a few new potholders. Instead I have made a 1920's Madeline Vionnet inspired dress, I used these images from McCall's patterns circa 1928 and 1929 (found here) as well as Betty Kirke's book. After three children the waistless look of the 1920's works for me, but I hope to add more shapely garments as I get back into my normal shape (and I will!).

But how does it count as a 'make do' you might ask. I will tell you; I only had one yard of my fabric and one hank of embroidery floss to make it from and I re-used hooks end eyes from an older project.

The Challenge: Make do and mend

Fabric: One yard of sea green rayon crepe

Pattern: None, the dress is all rectangley-square shapes. I used directions from the 'Easy Ways to Pretty Frocks' book originally published in 1929 as my starting point, then I modified it to suit my needs. The bodice is simply a rectangle with the neck hole cut from the center. I cut the remainder of my fabric into squareish shapes then pinned them to the bodice handkerchief style. I hand sewed all the seams with my floss but I made a narrow hem along the bodice sides and hemline on my machine.

Year: 1928 or 1929

Notions: One hank of DMC embroidery floss in color 169 Light Pewter, three hooks and eyes, gray thread

How historically accurate is it? fairly, it's mostly hand sewn, rayon crepe was available and used for dresses like this in 1928-9 and the style is period.

Hours to complete: Maybe three hours all told, I snatched time when my children would let me and re-worked a hat at the same time. Had I done it in one shot I estimate it would take about two hours to complete the dress alone, mostly due to the fact that I hand sew quite slowly.

First worn: To take pictures this evening with my daughter (she got some good shots during our brief, cold session!).

Total cost: Free, everything was from stash or re-used.


I also used this challenge to practice sewing bias seams on crepe fabric, my Innovation project will be a true Vionnet from the Kirke book which I have wanted to make since I was in high school.

Monday, June 3, 2013

Tamanegi-Kobo Sew Along 2013


So Me Made May has ended, and it was more fun than I thought it would be, but also challenging (as intended). I don't actually have many me made garments that fit currently and the ones I do have are all fairly new. As the month went along I (if not everyone else) also got to see how much baby grew as shirts that started out quite long seemed to shrink. I did have several dresses that I could have worn in addition, multi-way knit wrap dresses that I made before and during my last pregnancy, however I found that I didn't feel to good in them pregnant so I reserved them for non-pregnant wear. I also discovered a need for more me made bottoms, or any really.

I also really loved seeing well dressed people! On a day to day basis I generally see far too many leggings as pants (and tights as pants even, tights! Sheer, double-butt seamed, panty showing, transparent tights!) in my town, it is decidedly not pretty! The Flickr group was like a nice vactaion from that.


But now that the challenge has ended I wanted something else to keep me motivated to sew. Luckily I found the Tamanegi-Kobo sew along on Flickr, so I will be making the Iris dress (with some alterations of course!) I really like the style of the dress, even the back zip which I usually try to leave off of my dresses! I still need to find fabric and notions for it, but that's at least half the fun right?

Once I get my notions together I will be posting pictures here and on Flickr as well for anyone that might be interested.

Au revoir!

Wednesday, May 1, 2013

Me Made May, 2013


So I've fallen behind in the Historical Sew fortnightly; it has become less enjoyable to sew beautiful historic garments that I cannot currently fit (or that are in maternity styles of the past which I do not care for!). I will still participate, just not for each theme. Therefore I have decided to some more modern sewing, aiming at garments that I will actually wear, and not just stuff in my closet (not just maternity clothes). As such I have decided to join in Zoe's Me Made May challenge.

me-made-may'13

Usually when I sew non historical garments I make my up own designs, often I feel that this leaves me looking like an extra from a sci-fi film. I think this is due to the combination of my love of avante garde cuts and my loathing of trimmings. I once made a brown handkerchief hem wrap dress to wear with a beige kimono style sweater I had; people said they liked my "Star Wars" outfit, not good.

To remedy this I have been sewing from my huge stash of commercial patterns. Today as it it is supposed to be warm (81 degrees Fahrenheit or 27 degrees Celsius) I will be wearing a gray linen/cotton dress that I made from a vintage pattern, Butterick 5281.


I altered it for width to ensure future belly coverage and so I could leave out the zipper. I also plan to dip dye the hem a mulberry color, once I get some dye.
My accessories are all rtw, brown and white striped canvas flats, a loose weave purple ikat scarf and a brown leather belt.
And here it is! On the floor and slightly blurry, sorry I couldn't get a decent shot on myself with my phone's camera!


A bientôt!

Tuesday, April 9, 2013

A Striped Spencer, Linen Mitts and overdue photos...

Historical Sew Fortnightly challenges #6 and #7


Sadly again I am late! But two sick kids, the flu and pregnancy make blogging less than doable and less than desirable too! The garments however were done in time.

For challenge #6 I made a Regency style Spencer, the pattern is loosely based on Janet Arnold's riding habit and a mix of other historical patterns that I have on hand. I based the back's center curve on this fashion plate from 1810.


I used a thrift store cotton upholstery fabric as the main body of the Spencer and a floral cotton for the lining. Both were on hand. The buttons are from the 1960's, they are leather wrapped coat buttons with metal anchors and are completely inaccurate for this project! However they were there and I could not find anything suitable at the local JoAnne's (not that I ever can). One good thing about being sick, I had time to hand bind the buttonholes!


I really like the lines of the Spencer, (especially the curve at center back), but since my torso is changing shape quite quickly it doesn't fit so well as when I made a few weeks ago. Here is the best of the pictures my husband took for me, I am wearing the Spencer over my bodiced petticoat from the Peasants and Pioneers challenge and standing in the front yard.


The rest of the images are on Sally Stitch, she doesn't move so much as I do, or make unattractive squinting at the sun face as (apparently) I am fond of doing. Here is a side front view, the red is really a neutral red, not too warm or cool. It has a wide stripe of darker red running through it in a herringbone pattern. In fact the stripe is so wide it barely comes across as a stripe, you can see it best in the full length back view and in the shot of the sleeve details.


Here is a full length back view over the bodiced petticoat, please ignore the messyness in these images, my sewing area is perpetually chaotic!


Here is a detail of the sleeves, I placed two tucks at the inner elbow for ease of movement and to take in the excess fabric at the side seams that tends to occur with s shaped sleeve heads.


The interior is completely lined, I had just enough of the floral fabric to line the fronts and sleeves, the back is self lined.


I pleated the front linings to fit the darted fronts. You can also see that the insides of my buttonholes are significantly less pretty than the outsides.


The Challenge: #6 Stripes

Fabric: A thrifted red cotton upholstery fabric in a wide herringbone stripe pattern for the body, a brown and red printed cotton for the lining.

Pattern: My own design based on Janet Arnold and others.

Year: 1810

Notions: 5 large vintage leather buttons, one small, embroidery floss.

How historically accurate is it? Fairly, I did a lot of hand work on it, the shape, materials and pattern pieces are all accurate.

Hours to complete: Around six to ten, I never time myself!

First worn: Not yet, unless you count for pictures!

Total cost: Around $1.50 for the floss, everything else I had in my stash.


For Challenge #7, Accessorize, I made a pair of linen mitts. I based them on this extant example from the Met:


I love their length and the delicate hand stitching. They reminded me of The Portrait of Mademoiselle Riviere by Ingres from 1805 which I also used as inspiration. Neither of these mitts have the turn back point and since I don't like the looks of that anyways I left them off of my mitts.


I also used this image of mitts from a later period when drafting my pattern, however the placement of the thumbs ended up being slightly off for my tiny hands!


The linen I used is a darker brown with a lighter brown or beige weft, it was a light to mid weight with a lot of give on the bias. I hand sewed the mitts with overcast edges and backstitched hems. I flat felled the long side seams. I have not added the hand trim yet, I'm not sure if I will or not. I had them basted on but it looked lumpy too me once they were on, however without it the hands are a bit loose. I suppose I will try again!


Here is a detail shot of the stitching, I couldn't manage to take a picture of my arms inside of the mitts!


The Challenge: #7 Accessorize

Fabric: mid to light weight brown Linen.

Pattern: Hand drafted based on the shape of my arms, thumb gussets placed according to mitt pattern found online.

Year: 1805

Notions: Brown cotton thread.

How historically accurate is it? Accurate! All hand sewn of period materials.

Hours to complete: Two.

First worn: Not yet!

Total cost: Free, all stash goods.

Up next is the By the Sea challenge, will it be done in time? I hope so!

Au revoir

Tuesday, March 12, 2013

Peasant garb of the 1790's

Challenge #5 of the Historical sew Fortnightly hosted by the Dreamstress.


Now that I have completed a challenge for the Historical Sew Fortnightly (and on time too!) I am more determined than ever to complete the rest.

For the fifth challenge, peasants and pioneers, I have made a simple ensemble based on this quote (which I found on Wm. Booth Draper's fabulous site)

"Run away . . .  in New York . . .  an Irish servant girl . . .  had on a broad blue and white striped homespun petticoat, and a smaller striped blue and white jacket"

I love how they use period quotes to illustrate possible uses for their fabrics! My fabrics are close to what is described, a heavy blue and white thick striped ticking type fabric and a thinly striped blue and black fabric.


I have images that I am using to base the jacket and petticoat on, for the jacket; Agostino Brunias "Free Women of Color with their Children and Servants in a Landscape" painted between 1764 and 1796. Coincidentally it is also one of the images that the Dreamstress herself had posted!


This is a very interesting painting both in terms of its Art Historical significance (I could write quite the paper on this!) and its depictions of the difference in classed society's garb in the late 1700's.
I am basing my jacket on the third woman from the left's top, a high waisted blue and white striped jacket.

For the petticoat a photograph called "Newhaven Fishwives" taken by David Octavius Hill in 1845. While this is much later than the date I am aiming for the homespun look of their striped petticoat/aprons is just perfect.


For the petticoat I used a cotton/linen blend fabric, I believe it was vintage as it was exceedingly stiff at first but after several washings it softened up a bit! I only had two yards but just managed to eek out a bodiced petticoat, (using my old altered pattern from Jenny Chancey) there is a cut 1" up in the selvedge (whomever owned the fabric previously had cut it at each yard) which I will still need to patch as I used the selvedge as my hem. I also had to line the back with different fabric because there just was not enough to cut all the pieces I needed. All of the visible exterior seams are hand sewn, and it closes with hooks and eyes.


The jacket I draped based on pattern pieces from the Tidens tøj collection, I like how simple and unfussy the patterns they have available are to work from, and often the text is very parseable even though I don't speak Danish. I used the back lining pieces from Eleonora Sophie Rantzau's gown for the back portion and the front from the white gown in the Colonial Williamsburg Collection. The back skirt I cut as a rectangular panel the width of my fabric and gathered to fit.


I still have to iron them and get some pictures taken (hopefully tonight), but here are the statistics!

Here are some pictures at last! The inner closure of the jacket fastened over the bodiced petticoat.


The front upper ties closed and tucked securely inside:


The under bust tie fastened:


The full length back shot of the outfit on Sally Stitch:


A full length shot of the three quarters front on me:


Finally a full length side view, also on me:


The Challenge: #5 Peasants and Pioneers

Fabric: 2 yards of vintage linen/cotton ticking in a wide blue and white stripe.
2 yards of airy cotton lawn with thin blue and black stripes.

Pattern: A heavily altered Regency Gown Pattern
from Sense and Sensibility for the petticoat's bodice, the rest I draped with help from The Danish National Museum and The Collonial Williamsburg Collection.

Year: 1790's

Notions: 2 sets of hooks and eyes, 3 yards of bias tape, embroidery floss.

How historically accurate is it? Fairly, aside from the use of a sewing machine for the internal seams. The patterns are mostly historical ones aside from the petticoat's bodice and I hand sewed any visible seams.

Hours to complete: I'm guessing around 10...

First worn: Not yet!

Total cost: $2 a yard for 2 yards, so $4, the rest was stash goods!

A bientôt!